|
Afterglow comes with some pretty nice (I think) printable templates to use as your stellar obstacles to complicate your tabletop hyperlight warfare. But I'll always advocate for using 3D obstacles because they just make the game look way cooler. 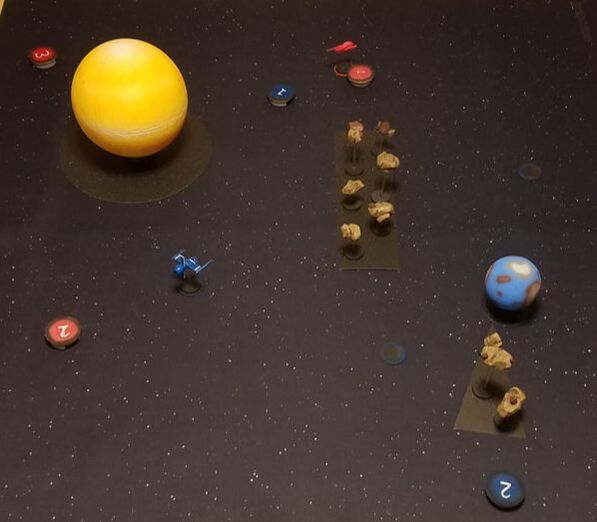 Fortunately, Afterglow doesn't need a whole lot of "terrain" like most skirmish wargames do. In fact, I only own about ten real pieces and a bunch of spare templates. I made them all over the course of two leisurely days, so there's not a huge time commitment for these either. And of course, they're super cheap to build.
You can make or buy nicer-looking pieces, but this is all stuff anybody can do without breaking the bank; it might end up costing you ten dollars total. The other benefit of these is they're 100% functional; you can simply pick them up and remove them from the template marking their boundaries on the table, then put them back as needed. This lets you measure more accurately or move markers anywhere you need to, preserving both the integrity and aesthetics of the game.  Big terrain is needed to cover for big models. Big terrain is needed to cover for big models. Plamo vs Plamo is often played with large buildings accounting for the majority of the terrain on the board. This is a for a few reasons:
That last point brings up a complication, though. In PvP the buildings are very interactive, using the Strcture rules; they get attacked, smashed, fall to pieces, catch on fire and explode. They have their own set of Critical Hit effects. But as a result, they need to be able to reflect a few states. Having them on fire or damaged is pretty easily accomplished with some markers, but when they actually get levelled by a howitzer, you need to leave the footprint of the ruins on the table. At first, when we were testing with paper cutouts, no problem. We would write "RUIN" on the piece of paper after a structure was adequately abused. But making the jump to 3D terrain presented a new challenge. What I settled on was a very thin piece of plasticard, airbrushed up enough to make it distinct on the table, but flat enough to not impede movement.  I'll cut to the very brief tutorial here and spare you the story below if you don't care. Plastic Sheet RuinsComponents:
Instructions:
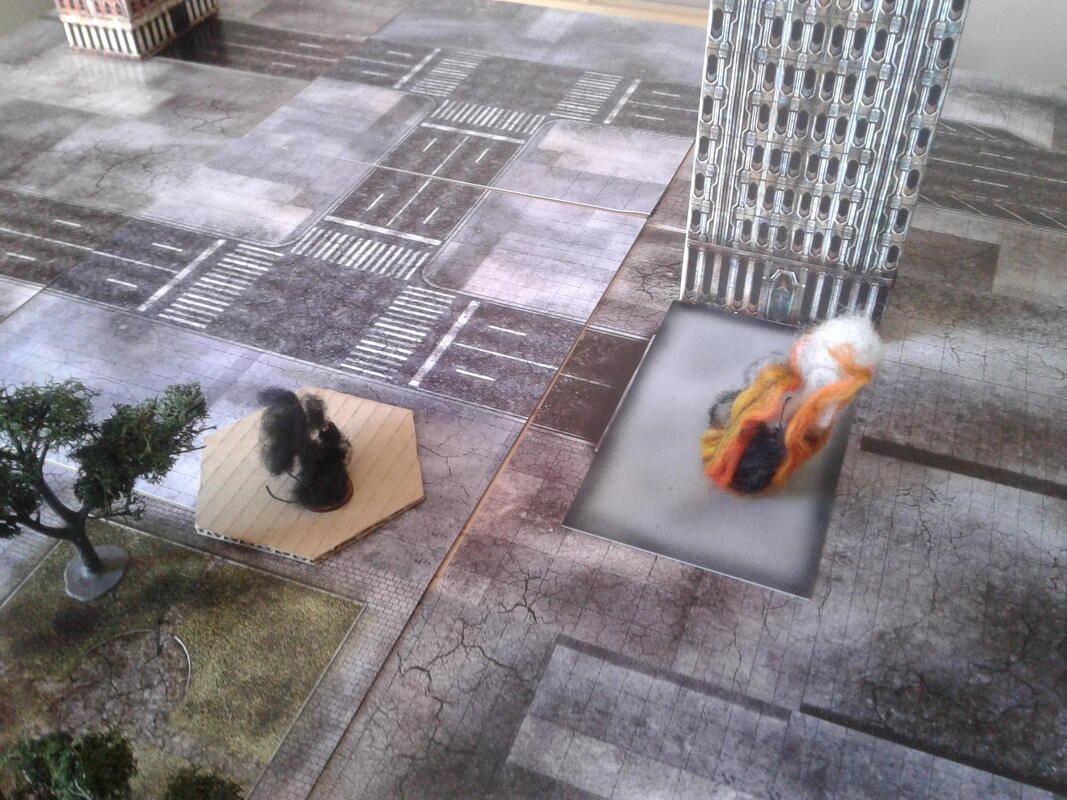 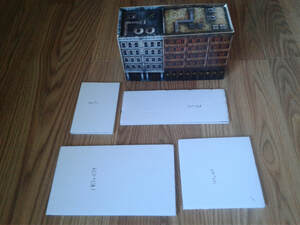 This wasn't my first choice, but it was a good intersection of price, speed to make, and utility. An added bonus is that they take up almost no room and add no weight to storage and transport; I just stack them, put a stiff piece of hardboard behind them all and wrap them with an elastic to keep them straight. I had originally wanted to do 3D stuff using foamboard and traditional wargaming bits like small piece of rocks and gravel, glue, that sort of thing. I have no doubt you could make a very classy set of building wrecks this way, but my early efforts didn't pan out right and I needed them before some demo games. My early plan was to make cutouts of all the base sizes of the buildings from the Dropzone set. Easy enough. But then when I started adding to them, the problems quickly turned the whole thing sideways. A lot of this is me being an IQ-65 moron, obviously. The first hint of glue, paint and primer started the warping process that led me to abandon these. The foamboard's bowing wasn't great, so I tried cutting vinyl tile and using them--a big standby for me with terrain basing. But cutting them as precisely as I wanted was time consuming, the edges needed to be dremeled, and ultimately, they were still actually annoying to play with since the models would end up being a bit tipsy on them. 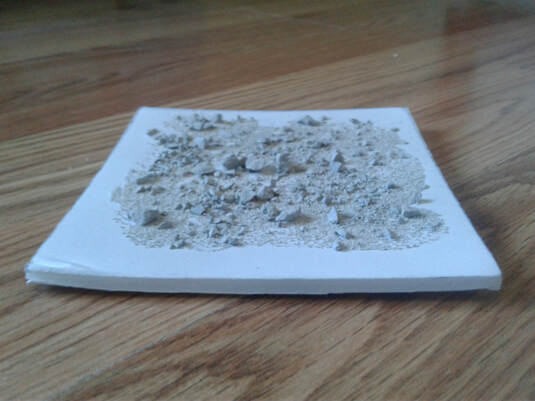 With some more effort this probably could have looked pretty good, but it still wouldn't have been as functional as what I have now. That's how we ended up with the burnt-edge rectangles as building ruins. They're just cutouts of .5mm plaplate with primer, a rough spray of gray plaint, and then the edges are airbrushed with a darker primer. I then clearcoated them with Future to protect them and topcoated them to take the shine off. Leave them to sit for a week so the paint can cure and harden and they don't stick to each other in storage and you're good to go.
|
Blogroll SearchArchives
September 2023
Categories
All
|
 RSS Feed
